User:Lilymoon/Tutorials/EggLayout-design
Contents
Drawing an Egg Design
This tutorial is a way to help those just starting out making Egg designs. It is combining tips from the forum tutorials dating 2008 and older as well as updated observations from current egg renderers. This is by no means the only ways to design an egg skin but I hope its a good starting point for some of you not sure how to start.
For this tutorial, you will need: An Art Program used to draw your egg design. Images can be created using basic drawing tools such as MS Paint or more professional tools such as Adobe Illustrator and Adobe Photoshop. A good, free program recommended by quite a few current Arrtists is GIMP. GIMP has features similar to those found in the professional tools such as layers (which is extremely helpful when adjusting your patterns) and gradient fills (for creating depth and detail to your colors).
Here is a list of art programs past and current YPP Arrtists! like to use.
General requirements:
1. Sizing and File type
- Your final design must be sized 256 pixels by 256 pixels.
- All images must be saved in the PNG format.
2. Event requirements
- You should submit original work - this means that you have to create the design yourself. References to copyrighted intellectual properties should be excluded from the entries . You may use reference materials for your work, but if you base your work substantially on a reference, please acknowledge it in your forum post. You do not need to acknowledge any game art used as reference material.
- Your design should be able to 'wrap' - this means that the two sides of the design should join up seamlessly with no discontinuity where the two sides meet. Test this by laying two copies of your design side by side and check if it has an unsightly seam running down the egg. Please note that while we encourage artists to present seamless designs, a seam is acceptable as long as the egg looks good when rendered. If you are unable to make a seamless design no matter how hard you try, submit the entry anyway if you feel your design is good!
- Remember the shape-changing effect of putting your design round an egg. A design that looks sensible in a square template could look strange on the final egg model. Keep in mind that your design may be rotated for the final egg.
- The scene also really burns out the details, so make the whole thing slightly darker than you would think. Slightly!
- Keep it simple. The design has to work on a relatively small object, make sure your design shines through.
Basic Grid layout
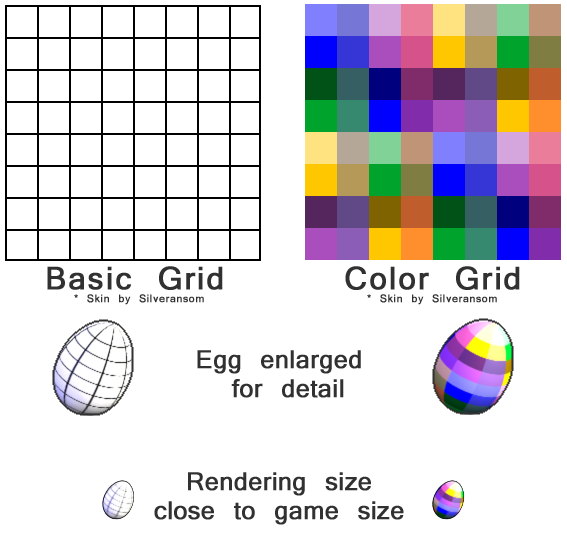
When you are trying to determine the layout of where to put your design elements onto your flat skin image, its good to know how a flat design looks when wrapped onto a 3D egg shape. The square, flat design you submit does wrap around the entire egg. That is why having a seamless entry is a good idea because the Ringers may rotate your egg depending on how they want it to appear in game. Let's review some basic shapes to see how that shape gets warped when wrapped onto the 3D egg element.
Here is a basic, evenly shaped grid. You can see how the flat skin looks compared to how it is wrapped onto the egg. This example shows a basic black and white grid and a color variation. These flat skins were originally created by Silveransom. Note how the squares in the grid becomes smaller, wider, larger or narrower based on where they fall on the egg. Note how the colors appear lighter and darker based on where it gets wrapped onto the egg shape.
This may affect your design by losing detail in the brighter areas or not seeing the detail in the darker areas.
Vertical Grid layout
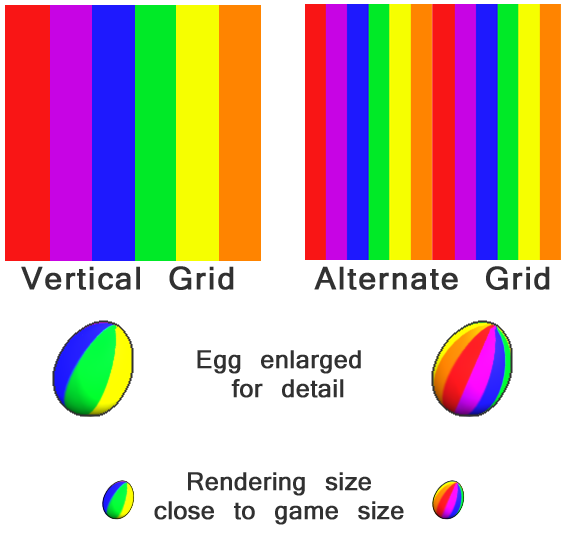
Let's see how vertical lines appear when wrapped. Now did you notice how the shape of those lines become narrow and wider depending on where they are on the egg? Also note the color changes. If you look at the first example, you will notice how you only see half of the colors due to placement in the design. This is due to the wrapping of your skin 360 degrees around the egg shape. In the alternate version, I've simply made the first one half as wide and duplicated the design so the colors all show up on the half of the egg we see when rendering the flat around the egg shape.
Non-Repeating Pattern Layout
The next big challenge that comes with creating egg designs is figuring out the placement of the actual design element that you want to be your main focus.
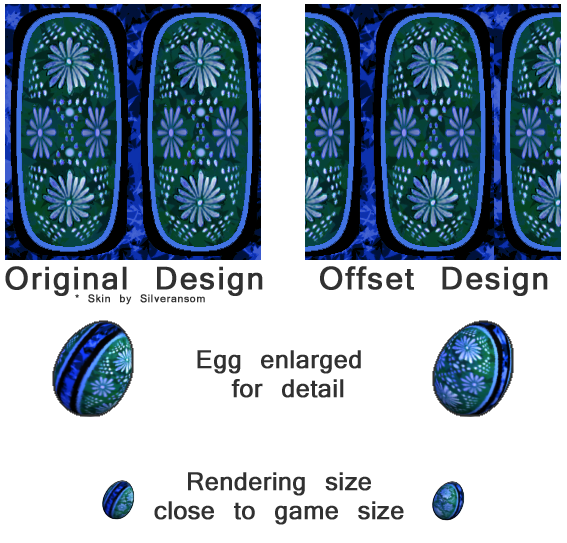
In the first example, you are focusing on the front area to be your main design element. In the second example, you are focusing on the side of the egg as your main design element.
Advanced Tips
1. Adding Detail
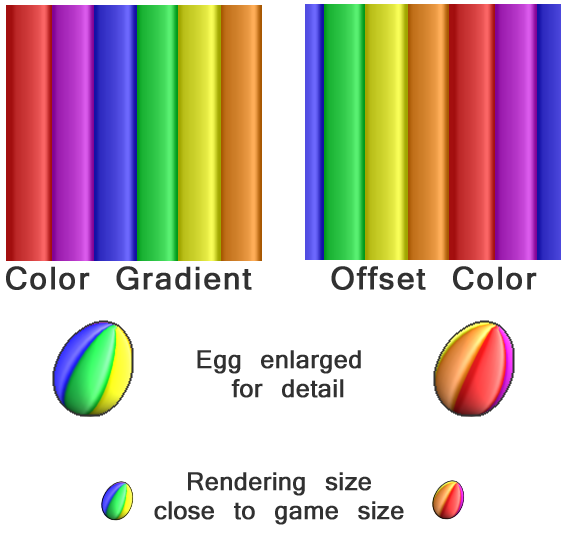
So far the images shown are all flat colors. Lets see how adding a gradient to each color changes the appearance on the egg itself.
This little step dramatically changes the look on the egg. Adding some shading, color variations, etc. do help give depth to those designs. I've also shown you what the same flat image looks like when you've offset it to show you what the rotation of your flat design looks like on the egg. Again, the Ringers may rotate your egg depending on how they want it to appear in game.
2. Changing the angle of your design
A benefit of having your design be seamless, is that it gives the Ringers options for egg placement and ultimately the design will look very different based on its skin placement. A tip for determining your design element placement is using something like Offset in Photoshop. A good place to start with using Offset is Greylady's tutorial.
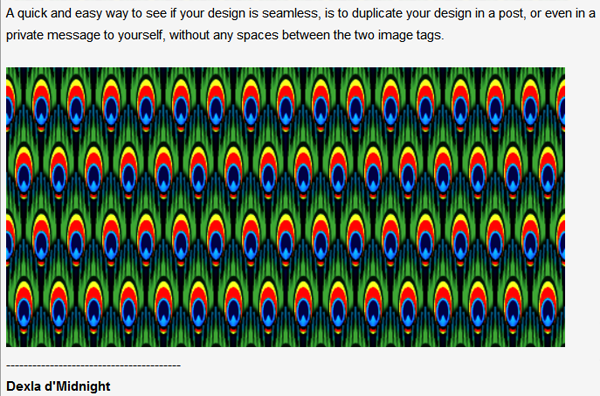
If you don't have a way to do offset on your program, Dexla suggests a very quick and easy way to see if your design is seamless. By using the YPP Forum you can duplicate your design in a post, or even in a private message to yourself, without any spaces between the two image tags as seen in the forum code below.
[img]https://YourSkinFile.png[/img][img]https://YourSkinFile.png[/img]
As Dexla shows, this skin is seamless just by sitting them side by side on a forum post.
Notes
This tutorial is meant to be a starting point for designing an egg skin. It is in no way meant to be a determining factor with having your design implemented in game.
For egg inspiration visit these sections to see what was submitted in the past.
This tutorial combines tips from past forum posts. You can find these posts here, here, and here.
