User:Artemiself
Guide to Piracy Skills: Everything You Need to Know to Improve
Ahoy there, mates! Welcome to my Guide to Piracy Skills: Everything You Need to Know to Improve guide. Here, I will be teaching you everything I know as a player to help all of you get the stats that you have always wanted. Whether you want distinguished, renowned, legendary, or ultimate, this guide will at least give some ideas as to what you will need to know to achieve your goal.
I will begin with bilge, then carpentry, then sails, as these are, in my opinion, the order from easiest to hardest of basic piracy skills. Then, I will move onto guns.
Bilging
The Basics
Bilging is a puzzle that lowers the water levels on the ship you are on. It is a useful puzzle because the higher the water level on a ship, the slower the ship goes and the slower your battle navigator gets moves during a sea-battle. Thus, this is indirectly connected to how well a crew will do on a pillage and how much booty you will get.
The process of bilging is the process of clearing blocks as efficiently as possible. In order to clear blocks, click somewhere on the board, and the two blocks within the target of your cursor will switch positions. Combos are preferable at higher skill levels, however they are not always possible, and that is why efficiency is also useful.
As for speed, it is not as important as one would think, however a faster bilger of the same caliber will get a higher score than a slower bilger.
Beginners (Able to Master)
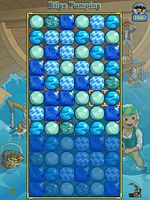
This is the basic bilging board on the right.
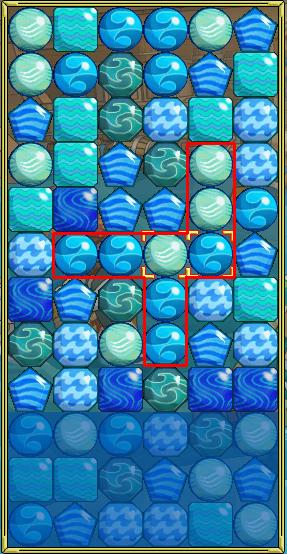
Here, you will see four different colors and styles of pieces. These pieces are the pieces that you want to align into rows or columns of three. Here is an example of such on the right.
As you can see, there are bubbles forming where the three pieces have been aligned. That means that there has been a valid break there, and thus you will earn points for such.
Now, in order to score well in the beginning, one must examine the board thoroughly to find any and all breaks that one can do. To be efficient and score well, one must clear three blocks or more with every click. This will probably assure you excellents or incredibles the whole time.
There will be special pieces that will come up. The pufferfish will clear a 3x3 square around it, the fish being in the middle. The crab, when brought above the current water level (see the darker region in the above two pictures) will give you extra points. For this piece, the higher the water level, and the more crabs you get in one clear, the more points it is worth. Last but not least, there is the jellyfish, which, when placed in the target with another one of those pieces, will clear EVERY one of those pieces on the board. That makes these pieces especially useful.
In the event that there are no clears you can make that involve one click, try to find a column that is only two clicks near the top - the top ensures that the most new pieces will surface, thus giving you the most opportunity to find a one-click (a clear that only takes one click will from now on be referred to as this, and such, a two-click takes two clicks to clear, etc.).
Later on, when you are doing well, you will be getting more types of blocks. That will make this method harder, but excellents should still not be difficult.
Advanced (Master to Ultimate)
Now that you are experienced in bilging with clearing single columns and rows, it is time to start learning to create and break combos. Combos are essential for gaining up the ranks, all the way to ultimate. At this point, you should have six or seven pieces on your board, which is the most that will appear. This is when single-breaks start to be less profitable and combos are more profitable.
As you can see, this is a bingo. A bingo is a NxNxN, and it is always the case where two N's are of the same color, and the third N is of a second color.
The most common bingo patterns are:
.....O
.....O
XXOX
....X
....X
....XO
XXOX
....XO
XXOX
....XO
....XO
XXOXOO
....X
....X
These are not that hard to find if you take enough time practicing and finding them. However, NxN patterns are also very useful. These are:
XO
OX
OX
X
X
OX
..O
..O
XXOX
....X
....X
OX
XO
OX
XXOXOO
Last but not least, there are donkeys and vegas's, which, respectively, are NxNxNxN and NxNxNx5
These are simply, respectively:
XXOXOO
....XO
....XO
and
.....O
.....O
XXOXOO
...XO
...XO
These ones are simple enough, however they are rare. So, for the easiest incredible and/or excellent, I advise to get NxN's and bingos mostly. To get the best scores, here are the maximum number of clicks I recommend to use to get any of these combos. Anything higher than these will probably be detrimental to your incredible, and as such, should not be done unless there is nothing else.
N break - one click
NxN break - two clicks
NxNxN break (bingo) - six clicks
NxNxNxN break (donkey) - nine clicks
NxNxNx5 break (vegas) - eleven clicks
Now, in the event that no combo is possible under or at these limits, you can always do such that:
Number of clicks = (# of N's-1) + maximum
This means that for bingos, its okay to do 8 clicks, but it will be the equivalent of doing a single, three piece break, which is detrimental to an incredible at these levels. Or, you can do a 3 click NxN break, but, like the 8 click bingo, it is also detrimental to your score. The exception is for vegas' and donkeys. When it is necessary to use so many clicks, it is usually advisable to get it anyway, unless you are working to get back up to incredible, because it is such a small difference for such a large combo.
Generally, combos are not hard to find for an experienced bilger. So, as your rank improves, you should find yourself doing less and less of the three-piece breaks, and more and more of the NxNs, bingos, donkeys, and vegases. This means that, in the beginning, at around master/renowned rank, it is alright.
Carpentry
The Basics
Carpentry is a very useful puzzle as well. Carpentry is a puzzle that lowers the damage that the vessel one is aboard, whether the damage is from sailing plainly and receiving damage a vessel always receives when sailing, or from cannonballs in a sea-battle. All in all, carpentry is as useful on a vessel as bilging is, after all, with high damage, it is impossible to get the bilge water down.
Carpentry is a spatial puzzle, and thus those that are more geometrically and spatially oriented will find themselves having the easiest time with this puzzle. This puzzle involves filling holes in the ship with five-square pieces as perfectly as possible in order to fix the ship.
The better a hole is filled, the more damage it repairs, and the better you will do on your Duty Report. This means that if you do more perfect fills than non-perfect fills, you will have a better Duty Report.
A perfect fill is called a Masterpiece. All holes have a number of squares that are a multiple of five - that is, if one correctly fills the holes and gets the correct pieces, it will [i]always[/i] be possible to fill a hole perfectly. However, because the types of pieces one gets are randomly given (based on probabilities, actually, but that is for later), it is not always possible to fill a hole with the pieces one has received.
On a side note, carpentry does not change will skill level besides the total number of holes one must fill to complete a board. Thus, I will not have a beginners and advanced section, but just one section for the bulk of the ranks, because the difficulty of the puzzle is constant throughout all the ranks.
The Puzzle
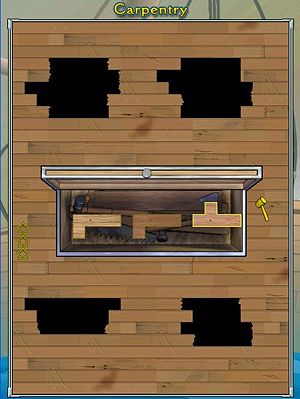
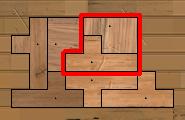
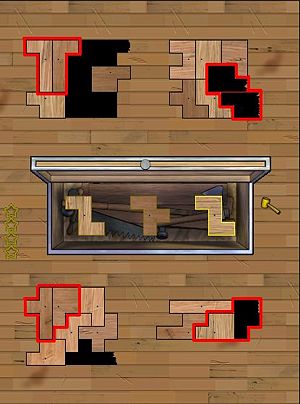
Here is the basic carpentry board:
As you can see here, there are generally four holes that need to be filled. The yellow stars on the left show how many holes have been filled, and the hollow stars show how many holes have yet to be filled. The number of holes is really irrelevant, except at the end, because thats when you have the least opportunity to use the pieces you don't want.
A hole that has not had any pieces placed in it for a long enough period of time will start to shake. What this means is that you will lose points if you wait until past the second piece placed after the hole started shaking. (If you place a piece, it counts as one turn, so at the end of placing the piece, a whole may start shaking. If you do one more place, the whole will start shaking even faster. This means that you have to place a piece in that hole the next turn otherwise you will lose many points.)
The best strategy for filling holes is working from the outside in. That means that all four holes should be working towards the center of their hole to make it easier to fit other pieces there. There are some common combinations that can be used to fill holes easily, using the most common pieces. Also, it is recommended that, when you are dealing with a nearly completed hole, wait until you have ALL the pieces needed to fill the hole in your tool box (that means I recommend only doing this for a hole in which you only need one to three more pieces to fill).
There is an order of pieces' rareness, as shown on the right.
So, this means that when on the verge of completing a hole, make spaces for a combination of the more common pieces, because these are the most likely to show up. Here are some common examples of ways to fit common pieces together:
As you can see here, the pieces I find the most useful are number one and number three, respectively, in the carpentry commoness table.
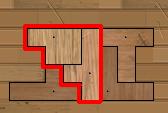
Other than that, its mainly practice. There are some common combinations, like such on the right.
These are all common and useful shapes to use, however there are many more.
But other that that, try to keep your holes with the most flexibility. The more flexibility you have in your holes, the more possible ways you can get a Masterpiece, thus improving your score.
There is only one special piece in carpentry, and that is the fill bucket. I recommend using it make sure that a hole that needs a rare piece to be completed be completely perfectly filled. Remember, the bucket can only fill up to 5 squares, so it acts as a normal piece.
Last but not least, the scores are simple. The more Masterpieces you have, the higher your bonus.Two consecutive masterpieces and than a Craftsmanship (an almost perfectly filled hole) is worth more than one masterpiece, a Craftsmanship, and then another Masterpiece.
Sailing
The Basics
Sailing is the skill that all ships need to have. That is, sailing directly increases the speed of the vessel. The better the sailors, the faster the vessel. This means that a good sailor is very useful on all sorts of things, especially in battles. In battles, the better the sailor, the more tokens the battle navigator has to make his moves, which means that the battle navigator will generally do better, which leads to more booty for everyone.
So, as you can see, sailing is one of the most important piracy skills.
Sailing is scored on how efficiently one clears the board, but also on the size of the the efficient combos one makes. Combos are more useful the higher the rank, however when just starting, it is usually good to just clear the targets.
Oh, before I get ahead of myself - a target on the sailing board is something that you must fill up in order to move onto the next board.
Because sailing is a timed game (that is, the pieces fall at a specific rate and can only be increased in speed and not decreased), it is advised that one be quick with their thinking because they cannot sit around and figure something out.
There are three types of breaks. There are the four-vertical breaks, which is four pieces of the same color stacked on top of each other. There are the four-horizontal breaks, which is four pieces of the same color next to each other. Then there are the target breaks.
Beginners (Able to Respected)
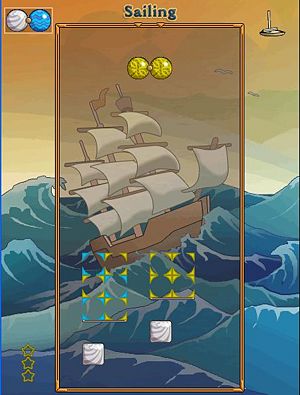
As you can see here, there are two targets. A target is a floating platform that has different boxes in it with different colors. In order to complete a target, one must fit all of the correct colors into the boxes in the targets. In order to flip a piece, use the side arrow keys - that is, if I wanted to put the 2xY (double-yellow block) into the bottom right hand corner of the left target, I would have to maneuver it into such a position that only one of the Y's are in the target - otherwise, I would have to clear the second yellow because it would be incorrectly placed.
The best strategies for these ranks is to do small combos. That is, doing doubles or triples only, and do them very rapidly. If you can, do bingos, but those are not advised.
Here is an example of a double:

This sort of double is one of the harder and rarer doubles because it involves two targets stacked on top of each other, and this combo is target -> target. However, one can also do it two different ways.
These, respectively, are 4-break -> target, and target -> 4-break. As may be obvious to some, the first combo is worth more. This is because the first combo's 2x multiplier occurs on the target, instead of on the four-break, and the target is worth more than a four break. So it would be equal to a 4-break + 2x target, instead of target + 2xfour-break. In regards to the first combo displayed, that would be equivalent to target + 2x target, which is worth more points than either of the latter two.
Because of this, it is always best to end on a target combo unless you can add things to it without taking away. That is, if you can make it a triple 4-break -> target -> 4-break, that is still worth more than a 4-break -> target. However, if ending on a 4-break takes away your chances of including another target, forget about that.
Advanced (Respected to Ultimate)
For a while, these combos should get you good enough scores if you are efficient with them. However, triples and bingos soon become necessary. An example of a triple is as such on the right:
As we see here, this is a 4-break -> target -> target, which is worth more than a target -> double, because this is worth 4-break + 2xtarget + 3x target, instead of just target + 2x target.
A bingo is such as on the right thumbnail:
This is a bingo ending in a four break, as I mentioned earlier. But this is when I need to address this next issue: if two things look like they will occur at the same time (the second 4-breka and the second target break), the target will ALWAYS break after all targets have been broken that are yet possible.
So, in this case, fthis is 4-break -> target -> target -> 4-break. This is equivalent of four 4-breaks being added to the end of the last combo.
But even after a while, even this becomes futile. At higher ranks such as renowned and up, one needs to start doing donkeys and vegases. A donkey is just one step further than a bingo, and a vegas is one step further than a donkey.
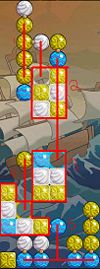
The easiest way to do these are things such as this:
Basically, this method is just stacking more targets on top of each other. However, sometimes, it is necessary to put a 4-break in the middle of combos so that two targets that would have broken simultaneously are seperated (this makes it a higher combo).
The same thing with a vegas - just add more steps.
As some last words, I have some things:
1. Be efficient with your piece placing. Don't just stick some pieces on the sides if you don't need them. Make 4-breaks out of them if you can, and add them into your combos. 2. Try to make your combos efficient. Don't just add a bunch of 4-breaks to the end of a combo to get a bigger multiplier, because, most likely, it will take extra time, which takes away from your time building combos involving targets. 3. If you are down to just one target on a board, just clear it to make it go away. Don't try to bingo on it or anything. Its usually not worth it if its just one target, so just clear it and move onto the next board so you can make another, higher-scoring combo.
By this point, you should be getting pretty good. So, as the conclusion to the three basic piracy skills, I bid you ado until you have mastered these and decide to move onto gunning!
Gunning
The Basics
Although gunning is not necessarily used outside of battle besides to fill guns [i]for[/i] battle, it is still a useful skill to have, and probably the fast skill to increase in rank if you know what you are doing. However, in battle, it is the most useful if you plan on engaging the enemies in a swordfight or rumble. This is because, the more cannon shots one has on an enemy, the easier it is for you to kill them in the swordfight or rumble that follows.
Gunning involves putting the correct pieces into some of the four cannons that appear on the board. This means, that if you mess up, you have to clean it out with the cleaning piece.
Unlike the other three non-officer duty puzzles (vessel piracy skills), this puzzle is based almost entirely around speed. This means that, if someone is very efficient with their placing of arrows (its how you direct pieces into the cannons, I will explain later) but slow with their loading, and someone is incredibly quick with their loading but very inefficient, the person who is faster will get the higher score and thus be a higher rank. However, if two people are gunning at the same rate, the person who is more efficient will get the more points.
Also, because gunning does not change as one advances besides in speed of the pieces (except one can adjust their speed anyway), I will not have different sections for different ranks, instead just one section.
The Puzzle
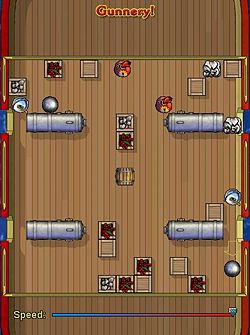
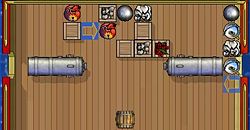
Here is the basic gunning puzzle board:
As you can see, there are four cannons here, with two sets of each piece. The buckets are the cleaning pieces, in which you direct into the cannons when you have made a mistake in your fill. The red, round pieces are gun powder bags, which go in first. This means they will be at the inside of the cannon (relative to distance from the center of the board). Then the square, whitish grey piece, which is the cloth, goes in next. Finally, the cannonball (self-explanatory) goes in last to fill the gun. When you have finished this order ocrrectly, letters will appear on the cannon saying, "Loaded" and you will not have to worry about that cannon any longer.
The bottom slider controls the speed of the pieces. At lower ranks, the speed is lower, but you can manually increase it. However, you cannot manually decrease the rank. Generally, if you want a better gunning score, it is better to have a higher speed. That is why I always use top speed, so I can fill the guns the fastest. However, if you are uncomfortable at a high speed, just lower it to a more suitable level.
In order to control where the pieces go, one must:
Laptops - press the direction of the arrow in WASD format (W = left, A = up, S = down, etc.) and then click.
Desktops - Click and drag in the direction you want the arrow to go in.
Whenever a piece runs into an arrow, unless it is blocked by a crate or another background piece, it will move in that direction. This leads me to the fundamental, most useful idea in gunning: the pieces move clockwise. If the cannon runs into a the right side of the board from the left, it will move downwards. Likewise, if a piece runs into the bottom of the board from the top, it will move left. This makes making loops very efficient (I will explain later).
I think the best strategy for gunning (although some would disagree) is the two cannon-loop method. It's what got me to legendary guns, and its what got my mate to ultimate guns, so it works.
A loop is basically a region on the board, using two or less arrows, that make all the pieces on the board pass by two cannons and then go around again, thus passing the two cannons, and repeating over and over. This is useful because it is quick (the pieces get to the cannons quickly), and it is easier to keep track of.
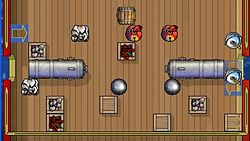
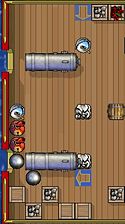
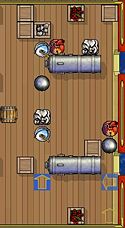
Here are the four basic loops, in order from more common to rarest:
Bottom:
Left:
Right:
Top:
Now, as you can see, these loops are simple - they past near two adjacent cannons, and thats all. Now, all you have to do is toggle the direction of the arrows pointing into the cannons (into the cannon and then in the direction of the loop and visa versa) and your loop is complete.
Once you have done this, you abandon your station. If you have done it quickly enough, it might rise to the next rank, but it might not.
From someone with experience, I went from able to legendary with this method on an alt in about 6 league points. It works very well.
In the event that there is no loop possible (always search through all the possible loops), just abandon your station and re-enter it. It will not hurt your rank that badly, and it will definitely hurt it a lot less than it would have been hurt had you just tried to fill them randomly.
