Service/Officer Training
| The topic of this article is subject to personal opinion, and does not represent any one absolute truth. | |
| If you disagree, discuss your concerns on the the talk page before editing. |
This is an officer training guide compiled by Service
Getting Started
Requirements
- Minimum 4 Broads in Sailing, Carpentry, Bilging and Gunning.
- Above able in Sailing, Carpentry, Bilging and Gunning.
- Narrow or above in Bnav and Dnav
What you will need to know
- Basic Bnav battling.
- Advanced Bnav battling (LSM) optional
- Jobbing
- How to operate a pillage. (At least sloop)
- Buying/Selling goods from/to the Market.
- Officer Rules and abide by said rules.
To have a successful pillage it’s wise to sail with at least 3/4 of the ships full capacity of players, the ships and recommended amount of pirates is below.
| Ship Size | Number of Pirates |
|---|---|
| Sloop | 4-5 |
| Cutter | 8 |
| Merchant Brig | 10+ |
| War Brig | 15+ |
| Merchant Galleon | 20+ |
| War Frigate | 40+ |
| Grand Frigate | 60+ |
These are basic guidelines and can be bent either way depending on your skill level.
Starting a Pillage
Before Starting a pillage ye must first check the Officer Board (located on the Navigation wheel) to see the Ships Stocking of Fine Rum and Cannonballs. Basic sloop stocking is 20-Fine Rum and 30-Small Cannonballs. Go to the hold and check the stock, if it meets the ships requirements your ready to sail, but if not you need to buy some from the Trade Commodities interface.
How to buy from Commodities market
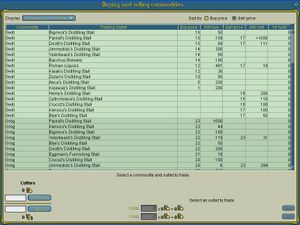
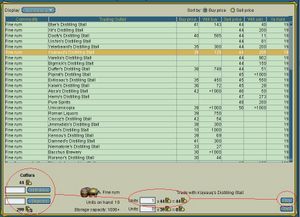
1. When opening the commodities market you are greeted with this screen
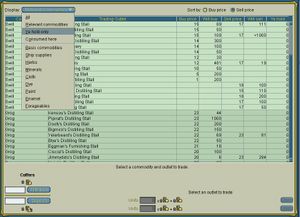
2. To quickly get cannonballs and rum go to the scroll tab and select ye hold
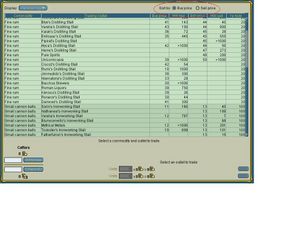
3. Here to get the cheapest Rum and Cannonballs you select the "sell" button by the sort by: Highlighted in red
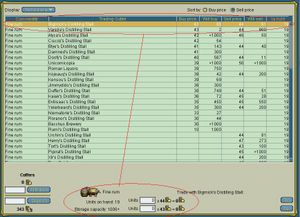
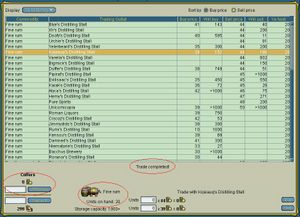
4.Apon selecting the cheapest(rum in this case) it will show you how many you have in your hold, how many you can store, how much it is and how much you can sell for.
5.Finally add yer Poe to the hold, select amount of what you wish to buy, and select buy.
6.Congratulations you have learnt the Commodities Market Trading. You should now notice that the Poe you deposited is now gone from the hold, the number of Fine Rum has went up, and there is a "Trade Successful" sign now up.
Charting A Course
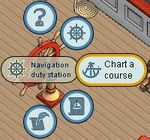
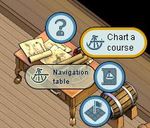
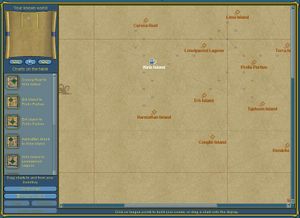
To chart a course you go to The Navigation Table, The Navigation Wheel or click on the map in your Booty panel.
To chart a course you do the following;
1. Click on the chart-a-course/view button
2. Once at this screen you can either click on the League Points or click and drag a map over to plot.
That’s charting covered now on to Jobbing
Jobbing
To job other players there are two ways of doing it.
- posting a job notice
- using the /Job command
Jobbing Notice
The Jobbing Notice is used pretty much like advertisement, using the Notice Board to advertise your crew and what you offer for booty shares.
Apon selecting this icon your jobbing notice is posted
Once you have selected the button 3 Robot helpers will come aboard. Now on a sloop you could choose to do a solo mission with these bots or wait for a player to job(Soloing is not wise when you are still learning to pillage).
When a Jobber applies you have two options,
1. Look at his/her info
2. Hire him/her to job
Clicking info brings up their Pirate Page which shows their stats ect.
Clicking Hire brings them aboard your ship and makes them a jobber in your crew.
Note: due to the new release this has changed the look of the jobber applying and how you would view thm but the ethics are the same.
/Job Command
when using the /job command you send an invite to people who asked to be jobbed, without having to click on hire like in a notice.
Example:
Service tells you "Ahoy can I be jobbed please?"
/Job Service
Service has been invited to job for Floruit Ab Intra.
Service has accepted the job offer for Floruit Ab Intra.
Service has come aboard.
Service vessel chats "Ahoy, Where do ye want me?"
During a Pillage
During a pillage the Officer's duties change and become that of an Officer, Keeping command over the Jobbers and others aboard the ship. This includes the /Plank command, Ordering and Bnav
The /Plank Command
The idea behind the plank command is quite easy, it is a command that kicks a pirate from the ship that you are on. Example:
Service says,"Pirate1 will you please work"
PirateA says," scupper aof u greenie scupperer"^
/plank PirateA
Service forced PirateA to walk the plank.
^this actually happened to me on a pillage, because of younger players i had to censor the words and to "protect" said pirate who said the words.
Ordering
Ordering is when you send an order to a pirate to work at a certain station, in some cases this is needed for pirates who will not work or pirates who require the order to work at the station.
Example:
Service says, "PirateA will you gun please"
PirateA says," Cant i need an order my badge died"
Service says,"Ok ill order you"
You have ordered PirateA to do some Gunning.
PirateA says,"Thank Ye"
Battle Navigation or Bnav is one of the hardest things to do in Puzzle Pirates, as it makes you think of the opponents, moves, where they are going to move to and how to counter it.
Basic Bnav has 3 main parts;
- Pursuit
- Battle
- Melee
These 3 parts all co-join in order and provide you with Bnav the base of pillaging. In this guide it will show you how to Bnav and the ethics of Sea Battle.
Know Thine Enemy
There are three main foes you will come across on the seas, they are:
- Brigands.
- Barbarians.
- Players.
There are also Merchants whom if defeated shower you in commodities That can be sold at Markets for Poe.
Brigands, Players and Merchants will Swordfight you at sea. Whereas Barbarians will Rumble you instead.
Pursuit
Pursuit is the beginning of Bnav. When one ship spies a ship they would like to fight, they select the ship by clicking on it then Pressing the Attack button in the Vessel Tab.
Apon pressing the attack button you receive the following message
PirateA issued an order to engage.
You are now in pursuit of the Enemy Ship.
You have intercepted the Enemy Ship.
For might rings look at Woodknight's guide to Might rings
Note: Due to the nature of the new release some of this has now been deemed void by use of the Auto-Attack option.
This is the Heart of Bnav, in this the Two ships face off against each other in a head to head battle.
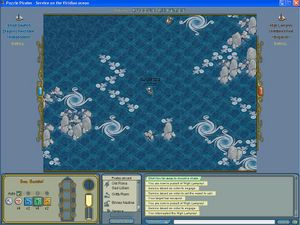
Apon engaging with another ship you are greeted with this screen:
As to be expected it wont look exactly like this as the bnav boards are randomly generated each time.
Below is a table of the moves and abilitys you have available and their effects. And a table of the natural pieces on a Bnav board
| Move Picture | Effect |
|---|---|
| Left Turn | |
| Forward | |
| Right Turn | |
| Cannonball | |
| Grapple |
The aim of the sea battle is to create damage that will appear in the Sf or Rumbling bit of Bnav, or for sinking the opponent in war.
This is the more practical bit of this guide and at this point you will go out on yer first training pilly as an officer.
At this point you will be given the option to go for advanced bnav or not. this section was made by Bloodycamiel
Hoy im Boodycamiel and this is my guide to Advanced Bnav Well first of all: Practice in the navy to see how the moves you put in work, to see how the movement bar changes to if you put in moves/shots. Also you will get in a whirlpool a couple of times, observe how they work! Know when to shoot and on which side to shoot if you are in a whirlpool and learn when to shoot when your enemy stays in a whirlpool.
Also what you can learn in the navy is how to use LSM (last second movement). Put your moves in at the last second of any turn to make brigands not read your movement bar. Learn how much time you need exactly so you don't run out of time before you have put your moves in! However when you do this too often they will do it back! they will put in or change their moves so late you cannot respond to it anymore, and if you try LSM in that turn they WILL read it! So my tip on LSM is to use it when you know you can damage them and then the next turn to run away without using LSM. Each time you have used LSM the previous turn they WILL use it back and each time you haven't used LSM the previous turn they WILL NOT use it back! So just LSM one turn, then 1-2 turns don't LSM, then use LSM again to damage them is a great strategy!
One More thing: for beginners it's very handy, but also for more advanced bnavers: Learn from other great bnavers! watch them bnav for a few battles if they allow you to and learn from it. watch them get out of positions where you don't know how to get out of, or how to prevent getting in situations like that.
I am not the best bnaver on PP so if anyone has better tips please do not hesitate to post them here
Oh nearly forgot: To max them In SF/rumble there is a table here:
| Ship Name | Small | Medium | Large |
|---|---|---|---|
| Sloop | 7 | 4 | 3 |
| Cutter | 7.2 | 4.8 | 3.6 |
| Merchant Brig | 12 | 8 | 6 |
| War Brig | 15 | 10 | 7.5 |
| Merchant Galleon | 18 | 12 | 9 |
| War Frigate | 30 | 20 | 15 |
| Grand Frigate | 36 | 24 | 18 |
For more advanced Bnav first what I think you will need to understand to use these strategies:
- Basics: moves, whirls winds, movement bar and such
- LSM (last second movement)
- Some experience in watching how imps (imperial brigands or barbarians) move
- Max damage for the enemy ship
First, you have to learn how Brigands think. I Think there's 4 things brigands will want to do, in order of their priority:
- Grapple you
- Shoot you
- Get closer to you
- Avoid damage
Yes 3 seems to come up before 4 a lot of times! The fact that 3 seems to come before 4 is the key. Especially the first turn, in which I think they don't seem to read your movement bar at all, not even if you put in moves early! That's why it's so easy to shoot them the first turn for many Bnavers. I do it like this: Calculate how they can get closest to you, or how they can grapple you if that's possible. If there's one square they must pass for this you just shoot that square and make sure you don't get grappled of course! Sometimes it even happens that you can shoot them 2 or more times the first turn without even using LSM! However my findings are that this only works the first turn of a battle and not even always... so always stay on yer guard.
Second I will discuss how to use the movement bar to fool imps. If you put in moves (or cannonballs) early the imps will read it and adjust their moves to what they think you will do. But they will read every piece of white in your movement bar as a MOVE and not as a cannonball!! This is very handy when you are out of moves or very low on them, or just in a good situation for it. To fool them you just only shoot cannonballs their direction (more or less) and don't put in moves and hope they will read it as moves and move within the area you are shooting! Or to just prevent getting shot on the spot where you are when you are out of moves! I find this strategy very hand in situations where yer opponent is with his front side pointing towards yer side (with 1-4 open squares between your ships)... If they wouldn't move you would just shoot them, but they will move. And if you do move you will always see that they turn into your movement direction and shoot you. In such a situation i just "bluff" two moves or so by putting only cannonballs in there. Most times they will make that turn because they think you move and shoot there... but miss ofcourse! Next turn you can use LSM again to get them damaged!
Also with using LSM (very obvious though) is reading your opponents movement bar and predicting what they will do. Then you will just use LSM to shoot them somewhere they will go. You will only be able to do this if you are a little more experienced in bnav and can predict better what imps will do. The priority system isn't perfect, very often brigands choose to damage you instead of going for an early grapple.
Of course there are many other strategies that I just don't know or that I just don't like, they can be very good too. But these are the strategies I am using to bnav mostly. If you have any questions or you think there is anything wrong in here feel free to respond here
