Art:How to get a transparent background using Photo Editor
From YPPedia
From this forum post.
Notes on Microsoft PhotoEditor
- You can download the Microsoft PhotoEditor.zip from here.
- You will need to have an unzipping program - such as the free 7zip or the paid for winzip installed on your computer so that you can unzip/extract the program files.
- Once you have downloaded the .zip, right clicking the file and choosing "Extract all" will unzip it so that you can use the program. (Make sure that you unpack the file to somewhere on your computer where you will be able to find it again!)
- Once you have extracted/unzipped the file, you will be able to click on the colorful PHOTOED icon to start the program.
Creating a transparent background for your image
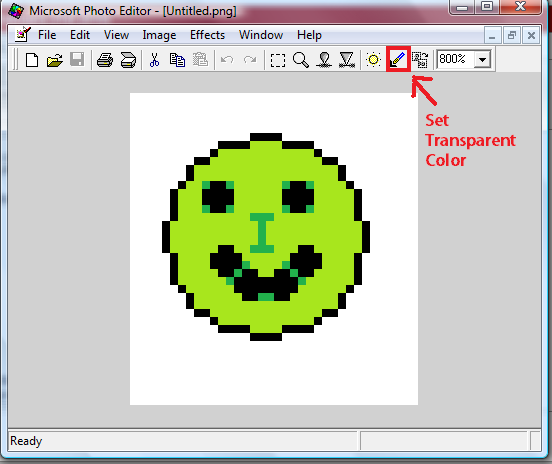
1. Make your trinket's background a color that isn't used anywhere in your design, and open it with Photo editor. Eg: I made my background white, as white isn't used in my lovely face design.
2. Select the "Set transparent color tool" (At the top, next to the little icon that looks like a sun).
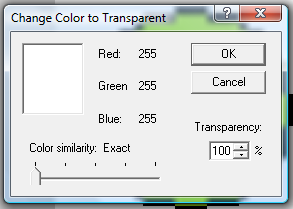
3. Click your background colour (Use the mouse wheel to zoom in if you need to). In the box that comes up, make sure it is set to "Color similarity: Exact" and "Transparency 100%", then click "Ok".
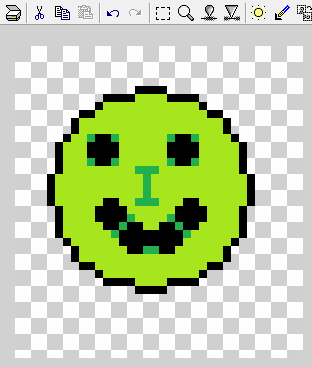
It should make the background transparent (shown as grey and white squares), but leave the rest of the image normal colors.
4. Save your image as a .png (using File>Save As).


