Art:How to colour in a black outline in GIMP
How to colour in a black outline in GIMP
GIMP is a free downloadable art program that can be used to create art, such as avatars for use on the forums. The following tutorial shows how to colour in a pre-drawn black outline, and is aimed at artists who are new to using layers.
You will need:
- To download and install GIMP
- A black outline of a picture on either a white or transparent background (preferably saved in .png format). This may have been created using GIMP or another computer graphics/drawing program, or may be scanned outline that has been cleaned up.
- A mouse or tablet (unfortunately I don't know of any keyboard commands for colouring in)
Step 1
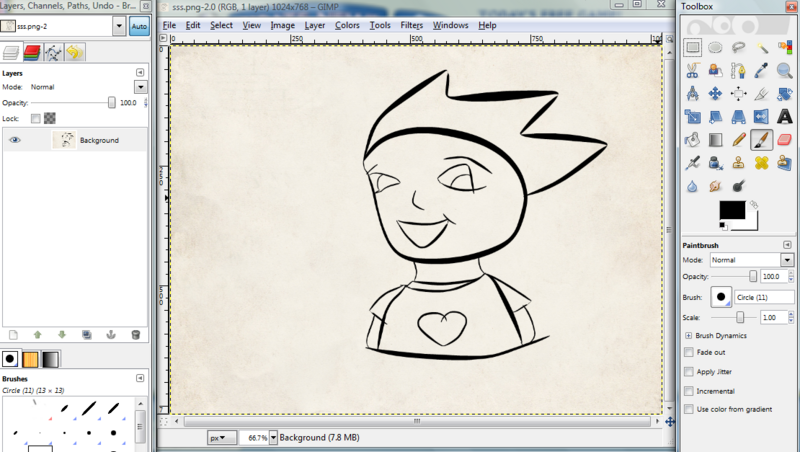
Open your black outline image in GIMP by going to File>Open.
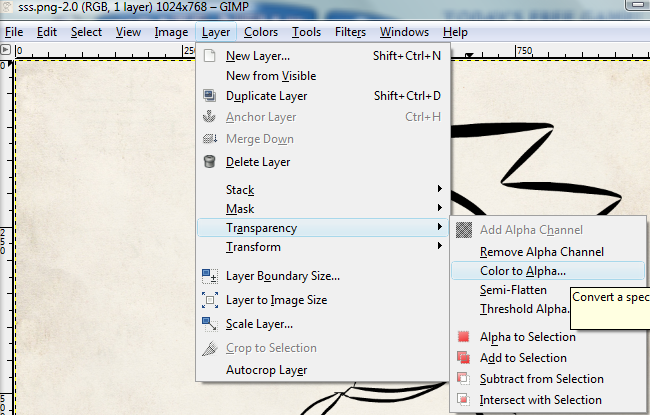
If your black outline has a white background (not transparent already) you will need to make it transparent. Do this by going to Layer>Transparency>Color to Alpha.
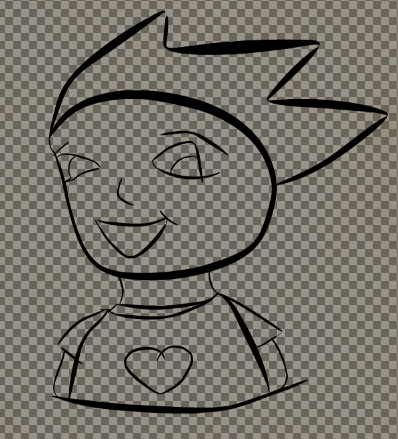
Click OK in the dialogue box that comes up, and your image should get a transparent background (shown by grey squares).
Now you are ready to start colouring it in!
Step 2
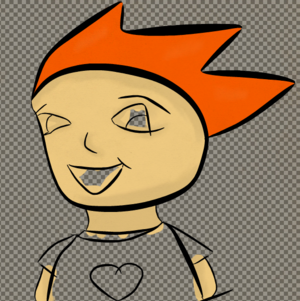
Make a new layer to colour on by going to Layer>New Layer. Check that the Layer Fill Type in the dialogue box that comes up is set to "Transparency", and click OK. Next, go to Layer>Stack>Reverse Layer Order to get your new layer behind your outline layer.
Use the brush tool (or any other tool you would like to use) to colour in your outline neatly - You can zoom in and out by going to View, and there is always the Eraser tool and the Edit>Undo command if you make a mistake!
Step 3
Now you have a lovely coloured in outline, it is time to give it a nice background as well! Go to Image>Merge visible layers to merge your outline and coloured layers into one layer. Then make a new layer for your background by going to Layer>New Layer. You will need to once again reverse the layer order to get your background to the back. Do this by going to Layer>Stack>Reverse Layer Order, as you did earlier (when placing your colour layer behind your outline layer).
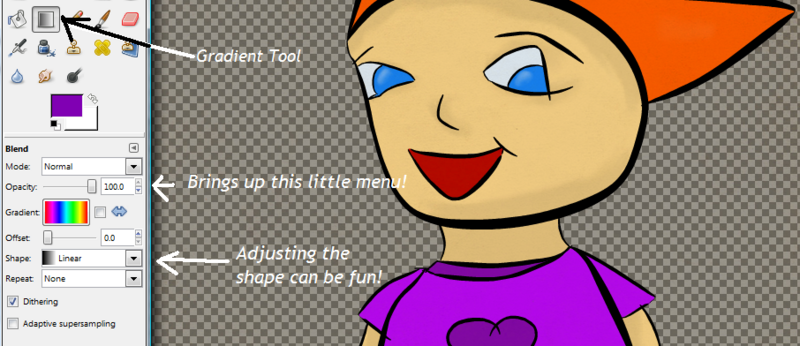
Click on the gradient tool. Choose a pretty gradient, and the shape you want that gradient to be.
Now click and drag on your picture to make a nice background!
You are now done and ready to save your image! (File>Save or Save As)
Spanish article: Cómo:Dibujar un contorno negro usando GIMP
