User:Lilymoon/Tutorials/3dsMax2018
Contents
Rendering Eggs Using Autodesk 3DS Max 2018
An update to Faeree's tutorial for version 2014.
For this tutorial, you will need:
1. Autodesk 3DS Max:
- For non-students: Download and install 3ds Max for a free 30 day trial.
- For students: Download and install 3DS Max for education use for a free 3 year license.
- Download and save the 3DS Max SimpleEgg file to your computer (see pinned post for zip file).
2. Photoshop:
- If you don't already own Photoshop, you can download a free 30 day trial.
- Download and save the Photoshop trim Egg Outline to your computer.
Opening the SimpleEgg 3ds Max file
There are two ways to open the egg rendering file.
1. Locate where you saved the SimpleEgg.max file on your computer and click/select Open. This will open the 3DS Max software and begin the file opening steps (see next section).
OR
2. Open 3DS Max software, and click on the the word File in the top left-hand corner of the screen. Click Open and locate your SimpleEgg.max file. If you've already opened this file, you can select Open Recent and your file will be listed.
The SimpleEgg file opening steps
When the file opens, you have to go through a lot of selections to finalize the opening of this file. Let's walk through each of them visually.
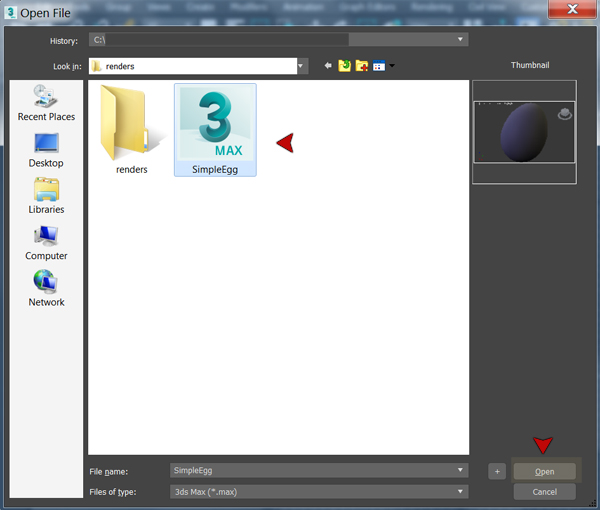
1. Click Open. This is when you will start seeing windows pop open. Just follow these directions so you don't change the files settings.
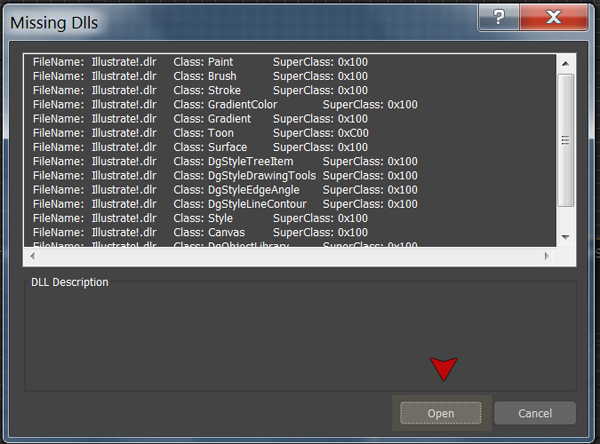
2. Don't change any settings on this window.
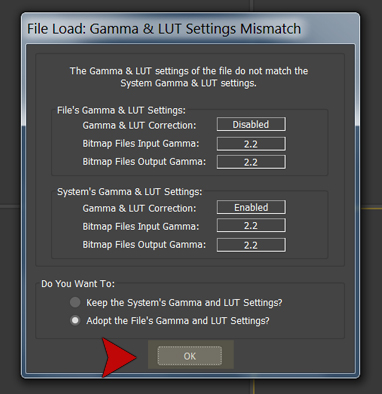
Click OK making sure the Adopt the File's Gamma and LUT Settings? option is selected.
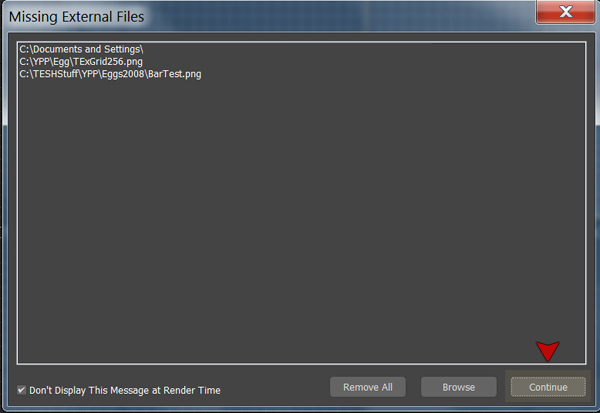
3. Click Continue. Its ok to check 'Don't display this message at Render time.' However, this window may still pop up the next time you open the program.
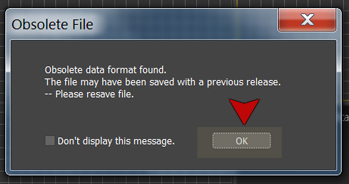
4. Click OK. Its ok to check 'Don't display this message.' However, this window may still pop up the next time you open the program.
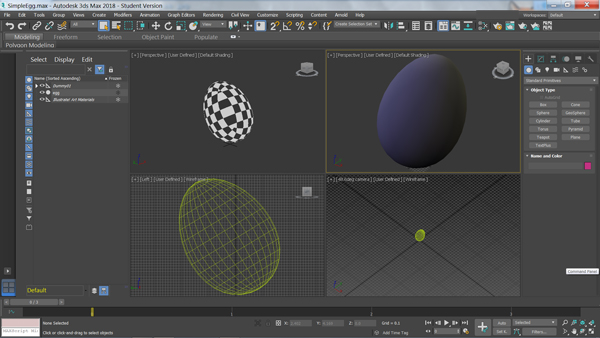
Congratulations! If you've done these steps correctly, you will get a page that looks like this:
How to Render your File using the SimpleEgg 3DS Max file
Now that you've opened the file, lets figure out how to actually make an egg image!
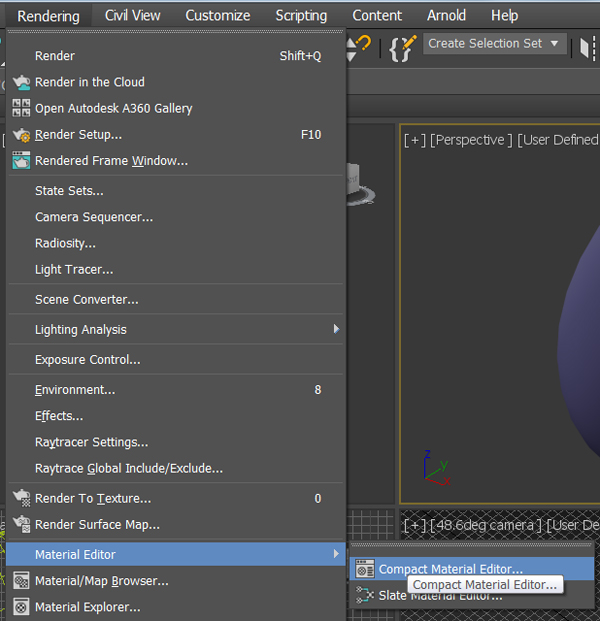
1. Locate the word Rendering in the top menu and click on it. This will open a drop down menu. Mouse over the option Material Editor and select Compact Material Editor.
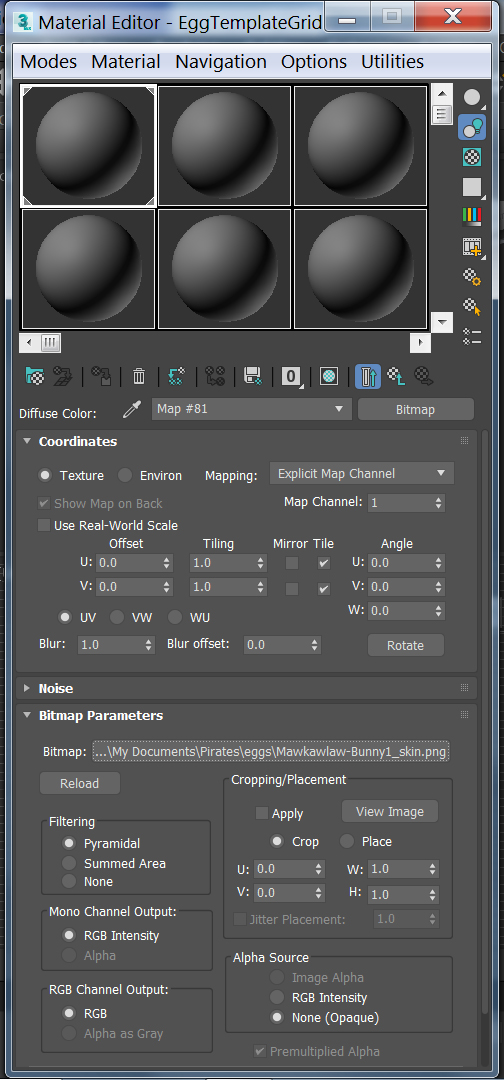
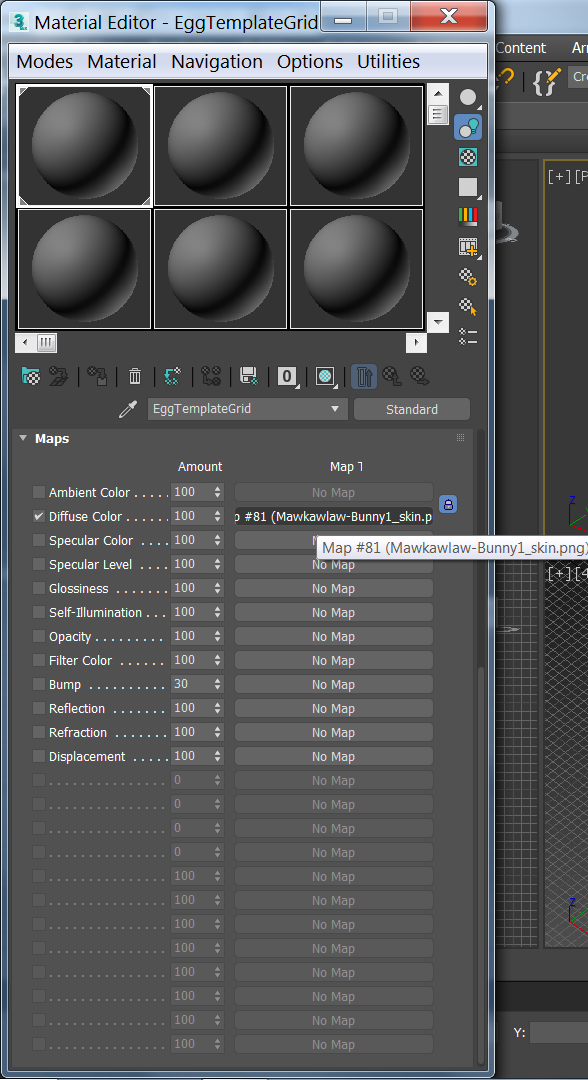
This should bring up something that looks like the images below. Make sure there is a white box around the sphere in the top left corner.
You want to look for where it says "Map #81 (Mawkawlaw-Bunny1_skin.png)" and click on that text. There are a few ways you can open this file, but you will eventually be directed to the Bitmap Parameter section (as shown above). The Maps section is another location where you can locate this file. If you do use the Maps section, be sure that Diffuse Color is checked. This will change the Editor to look like the image below.
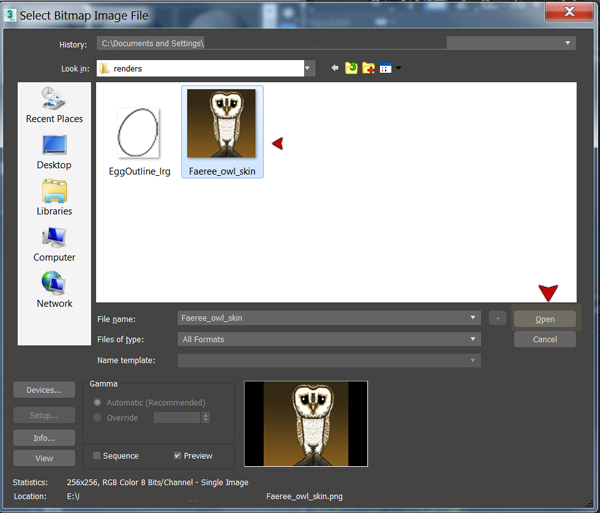
3. Click on the Bitmap link and it will pop up a file browser where you can then locate your flat skin file to start your render. See example image below.
4. Select your skin file and click on Open. This will return you to the Material Editor window. You should now see a version of your file in the upper left corner.
5. Next step is to actually render the flat design onto the egg shape. You can do this a few ways.
- Press Shift+Q on your keyboard or go to Rendering -> Render from the top menu.
OR
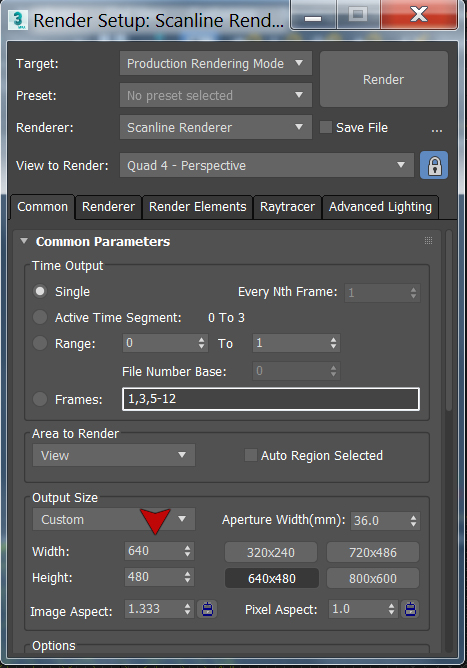
- For Render Setup press F10 on your keyboard or Rendering -> Render Setup from the top menu. You can use Render Setup to do things like change the egg size or angle. However, the default settings are closest to the in-game setup. See example below. If using Render Setup, you will need to select Render to create the egg image.
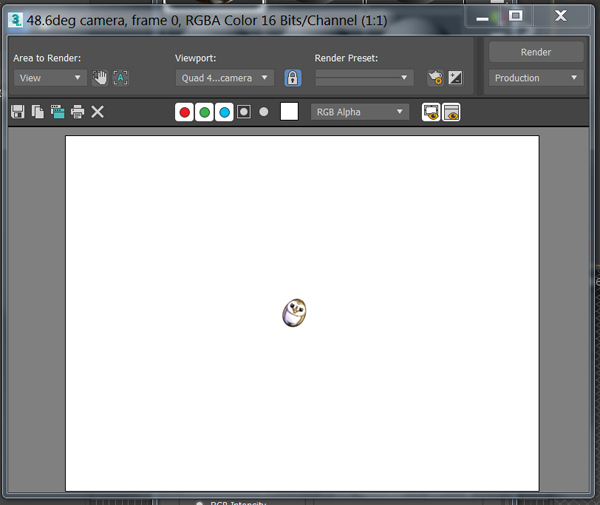
Below is an example of what a rendered egg in 3DS Max should look like.
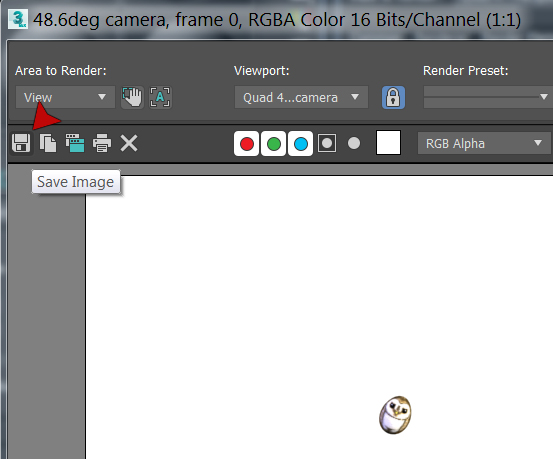
6. Next you will need to save your newly rendered egg by clicking the Save Image button as seen below.
To save the egg correctly you will need to do one of the following:
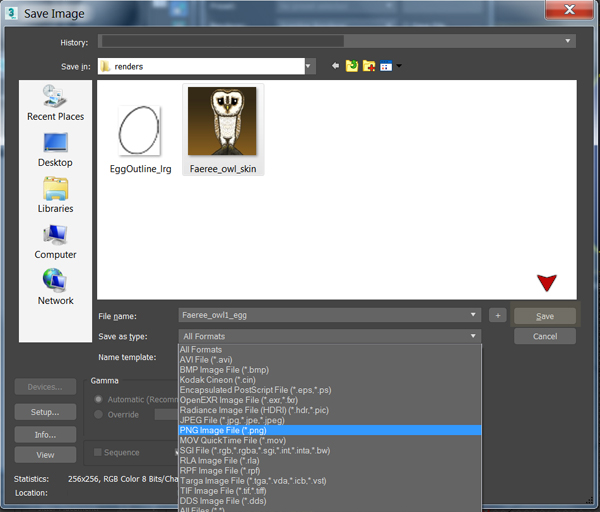
- Type in the name of your egg file. I usually use this format (filename-version-number_egg). Then select the option PNG from the drop down menu under the Save as type section. Then click Save.
OR
- Type in the name of your egg file. Then manually type the file extension, such as filename#_egg.png. Then click Save.
Note, in both these instances your egg file must be saved as a PNG file type.
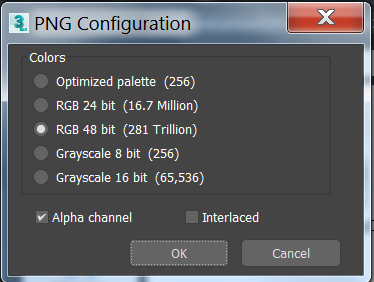
Once you click Save a pop up window will appear. Make sure RGB 48 bit is selected and that there is a check mark next to Alpha Channel. Then click OK.
Congratulations! You have now saved your rendered egg!
Note:When you are finished rendering your eggs in 3DS Max, close the program but be sure to select Don't Save when asking if you want to save your SimpleEgg.max file. That way you don't accidentally change the default settings.
Resizing your egg file in Photoshop
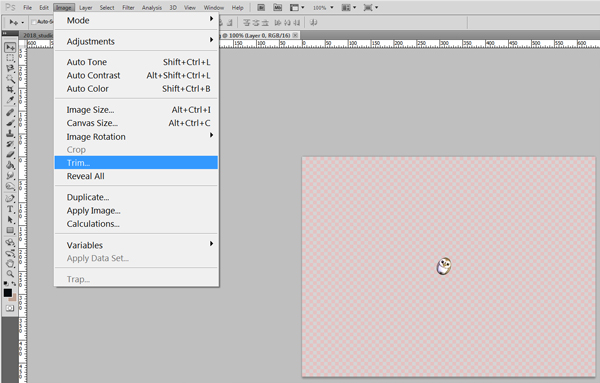
1. Open your egg file in Photoshop. You can see its got a large canvas size so you will need to crop the background. Note: I'm using Photoshop CS5. Older or newer versions may appear slightly different.
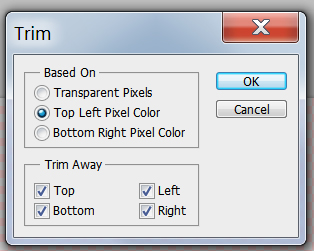
2. Go to Image and click on Trim. Make sure the Based on option has Transparent Pixels selected and that the Trim Away option has all options check-marked (top, bottom, left, right).
3. Once cropped add the egg outline file as a new layer to your rendered egg file. To do this, open the Egg Outline file and select Duplicate Layer. Then close this file.
4. Once back at your egg file, you will need to merge the two layers. You can do this via the Layer top menu Layer -> Merge Layer or by using Control+Shift+E on a PC.
5. Once merged, click Save. The file should be saved as a PNG-24 (which keeps the transparency of the background).
Here's an example of the final version:
Congratulations! You have now finished rendering an egg using 3DS Max 2018 and Photoshop!
